Wednesday, 6 March 2013

Pretty and Polished Spring Sonata Selections

Press Sample

Goooood Morning!

Today I have some swatches from the new Pretty and Polished Spring Sonata Collection. This is a beautiful collection full of pastels and glitter and glittery pastels. Sounds awesome right? Let's jump in!

Pretty and Polished Candy Carnation

First up we have Pretty and Polished Candy Carnation. Chels describes this polish as, a lovely soft candy pink creme with holographic sparkle. This pretty much hits it right on the nose. I really love the soft holographic sparkle to this polish. My camera did not pick it up, but it is extremely subtle in real life. Just enough that it is completely work appropriate but gives you that little bit of extra something that I love.

Pretty and Polished Candy Carnation

Formula on this was wonderful, this swatch is 2 easy coats with NYC topcoat. This is a beautiful spring polish that will be perfect as a base in nail art in the future.

Pretty and Polished Candy Carnation
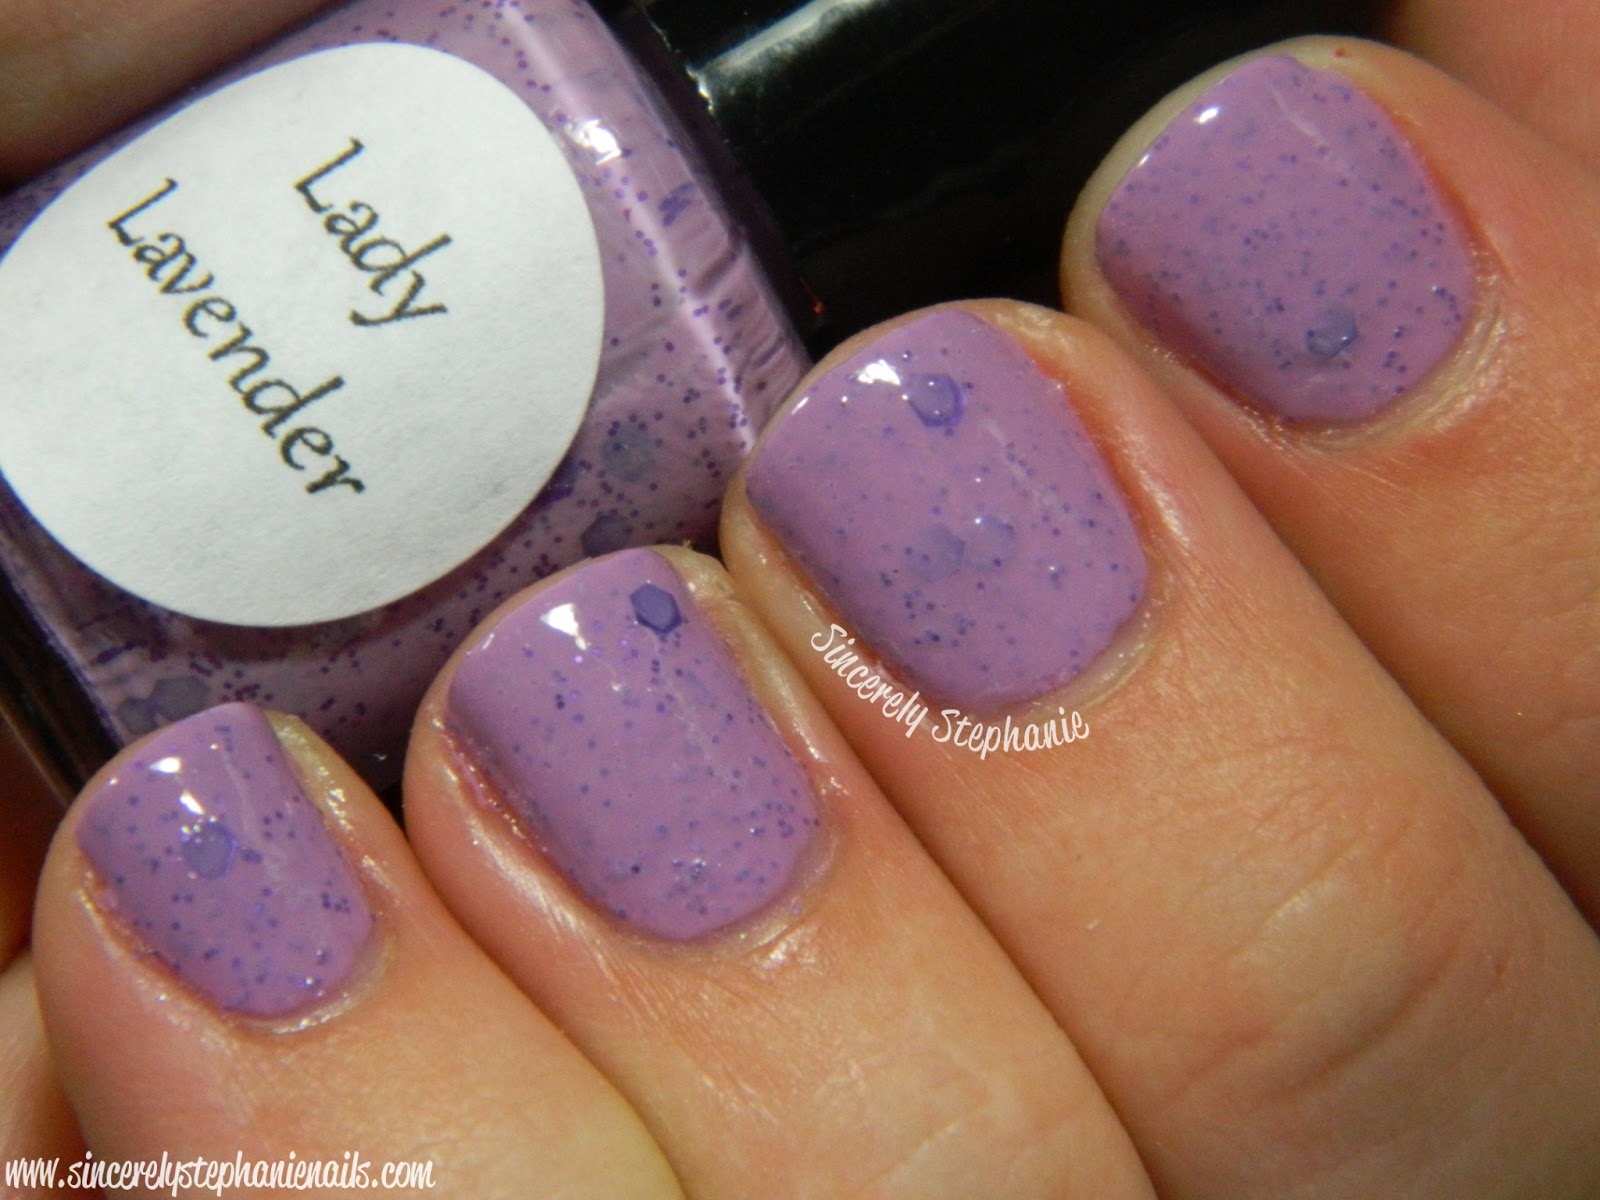
Pretty and Polished Lady Lavender

Next up we have Pretty and Polished Lady Lavender. Chels describes this polish as, a luscious medium purple creme with several shades of purple glitters in it. I love this shade of purple and my camera actually captured this accurately! This will dry a little bumpy so a thick coat of top coat is definitely necessary.

Pretty and Polished Lady Lavender


This is about 2.5 coats of polish. I say 2.5 because I went back and tried to add some of the larger glitters to my nail so you could see them. I had trouble getting them out of the bottle, which could be because I had a mini bottle. This issue could be resolved with the full sized 15mL bottle or with some more vigorous shaking to loosen up the larger glitter from the sides of the bottle.
Pretty and Polished Lady Lavender
Pretty and Polished Bashful Bouquet


Lastly we have my favourite, Pretty and Polished Bashful Bouquet over Candy Carnation. Chels describes this polish as, a fun pastel glitter topper packed with spring shades. I absolutely LOVE this glitter. It is completely unique in my collection and is a perfect topper to some of the other pastel shades in this collection.

Pretty and Polished Bashful Bouquet


This is 1.5 coats of Bashful Bouquet. I went back and dabbed a few more glitters to get a fuller coverage. I really enjoyed the combination of satin pastel glitters and the micro green sparkly glitter. Extremely unique and perfect for spring. I'll be busting this out again.

Pretty and Polished Bashful Bouquet

Pretty and Polished was the first ever indie brand that I purchased from and they continue to be one of my absolute favourites. Constantly innovating and creating unique and beautiful polishes. This collection is absolutely no exception.

Pretty and Polished Spring Sonata can be purchased here or here for $9.00 for a full sized bottle or $25.00 for the whole mini collection.

These are gorgeous and I highly suggest that you pick some of them up! Make sure you keep up with Pretty and Polished on Facebook. Have a wonderful day!

Products in this post provided for my honest review.
 

Strap On Your Moonboots: Introducing China Glaze Hologram


TRAVEL TO A NEW GALAXY WITH CHINA GLAZE®


China Glaze® Introduces 12 Illuminating Holographic Lacquers with Hologlam

Los Angeles, CA – (March 2013): 3…2…1…Blast off! Take your summer manicure out of this world with China Glaze® Hologlam, an all new12-piece collection of shimmering holographic nail lacquers. 

China Glaze® established itself as the leader in holographic nail lacquer with the 2007 OMG! collection, one of the most popular collections in the brands’ history.  Fueled by that success and back by popular demand, China Glaze® Hologlam uses reflective, holographic particles to capture light and transform nails into amazing, ever-changing visual effects.  With a strong linear finish whether indoor or shining bright in the sun, China Glaze® Hologlam bends and changes, creating an illuminated three-dimensional, traveling color effect across the nail.

The China Glaze® Hologlam collection features 12 futuristic shades, including:

Get Outta My Space: powdered violet

Astro-Hot: soft, baby pink

Infra-Red: warm, magenta pink

When Stars Collide: warm maroon

Not In This Galaxy: bright, warm coral

OMG A UFO: warm, moss green

Don’t Be A Luna-Tic: turquoise aqua

Sci-Fly By: light, silver blue

Take A Trek: cool, denim blue

Strap On Your Moonboots: midnight sky blue

Galactic Gray: warm, gunmetal

Cosmic Dust: silver metal

The China Glaze® Hologlam collection will be available in April 2013 at fine salons and beauty supply stores nationwide with an SRP of $14.

China Glaze is free of DBP, toluene, and added formaldehyde.

China Glaze nail lacquers are available through salons and professional beauty supply stores nationwide. For more information, please visit www.chinaglaze.com or follow China Glaze on Facebook (@ChinaGlaze), Twitter (@ChinaGlazeOfficial) and Pinterest (pinterest.com/chinaglaze).

China Glaze® is a division of American International Industries.

About American International Industries
For 42 years, AII has been the leading manufacturer and worldwide distributor of innovative, quality beauty and skin care products for men and women.  Our product lines include Andrea, Ardell, Body Drench, Bye Bye Blemish, Checi, China Glaze, Clean + Easy, Clubman/Pinaud, Duo, European Secrets, EzFlow, Fright Night, Gena, GiGi, Gypsy Lash, IBD, It’s So Easy, Jeris-Lustray, LASH BeLONG, Nail Tek, No Tweeze/Micro Tweeze, 'N Rage, Poshe, Prolinc, RAW, Seche, SuperNail, Surgi-Care, Waterworks, Winning Nails, Woltra, Woody’s, and Youthair. For more information, visit our website: www.aiibeauty.com.

********************************************************************************
What do you guys think of this?! I have started to see some preliminary swatches popping up and I am intrigued about the holographic power of these beauties. I hope they are super linear when I finally see them in person! 
What ones are you most interested in? The darker holos always catch me! 


Tuesday, 5 March 2013

Money Smart Nail Art: Dotted V-Gap Tutorial

Purchased by Me

Afternoon Everyone!

I have a ton of swatches to share with you, so will have more of those coming up soon but I wanted to share some Money Smart Nail Art! I heard about this nail art contest where you had to come up with a money smart look so you can feel good with a do it yourself manicure instead of going out and spending lots of money on new clothes or a hairstyle or even paying someone else to do your nails! I'm a broke student so I'm all about coming up with looks on a budget so I jumped at the chance!

I decided to create a dotted v-gap look that looks a lot more complicated than it is. Let's run through how to do this!

Supplies:

  • 2 polishes of your choice (I have used NYC Lexington Yellow and Wet n Wild I Need a Refresh-Mint)
  • Any colour striping tape or regular tape cut into small strips
  • A small dotting tool or a pen or a pin stuck into an eraser
Steps:

dotted v gap tutorial

Instructions:

  1. Gather your supplies and choose your two colours. (I accidentally grabbed Sally Hansen Blue Me Away instead of Wet n Wild I Need a Refresh-Mint for this picture)
  2. Paint a few coats of your base colour and allow to dry completely, I used a coat of Seche Vite to speed up the drying process
  3. Take your tape and cut pieces and line them up with the middle of your nail
  4. Take your contrasting colour and paint starting from the outside swooping up to create that curved line 
  5. Remove the tape and clean up any excess polish you may have on your skin 
  6. With your dotting tool and your first polish make dots along the curved line
  7. With your other polish place dots on the inside and going up your nail
  8. Clean up and add your favourite quick dry topcoat!

dotted v gap nails
dotted v gap nails
The polishes I used can be easily found at your local drugstore for a few dollars a piece and if you don't have dotting tools or striping tape it is easy to use regular tape and a pin stuck into an eraser! You could do this look in endless colour combinations :)

I hope you enjoyed this tutorial and let me know if you have any questions or what you think! If you'd like to enter into the contest here are all the details.

Hope you're having a great day!

Monday, 4 March 2013

Mrs. P's Nail Potions Gold Digger and Spring Fling

Press Sample Purchased by Me

Afternoon dolls!

Over the next little while I'll be putting a hold on nail art and trying to get through this stack of reviews that I have piling up! The amount of schoolwork I've had this term has been out of this world so I haven't been able to get these up until now. Today I have two really pretty polishes to share with you from a new to me indie brand Mrs. P's Nail Potions. First up I have a wicked colour changing polish, Gold Digger!

Mrs. P's Nail Potions Gold Digger

This is the polish in it's natural warm state. My nails are pretty short here, but you can see where I have free edge the polish changes from a deep gold to a deeper brown. This is three coats without topcoat. I wanted to capture the colour change first incase top coat affected it.

Mrs. P's Nail Potions Gold Digger

Here is the polish right after I dunked my nails in cold water. My house was pretty warm so I took this picture right away while my hands were all wet to get the full colour change for you guys.

Mrs. P's Nail Potions Gold Digger

These are taken as my hands were warming back up. I still had a drop of water on my nails in the first image so the colour stayed darker there. It took about 5+ minutes for the polish to completely change back to it's warm state colour.

Mrs. P's Nail Potions Gold Digger

I like that the colour change was significant enough that you could really tell the difference, however it was subtle enough that it took on a gradient look over my free edge. I want to wear this again when I have longer nails to really get the gradient look going on. A note on the formula of Gold Digger, the first coat goes on almost translucent and hardly looks like you have any polish on your nails. It will build to this after 3 coats but I was slightly alarmed when I applied my first coat.

Mrs. P's Nail Potions Spring Fling
The second polish that I have to share with you is Mrs. P's Nail Potions Spring Fling. This is a bright springy polish that is perfect for this dreary time of year up here in Canada. I layered this over Born Pretty Store Sweet Color #009 which has a similar mint base (review coming soon) because in the bottle it looked a little thin, although I do think this could be buildable if you wanted a sheerer look.

Mrs. P's Nail Potions Spring Fling

I'm totally obsessed with mint right now, ok all the time, so this polish was right up my alley. The glitter does get a little buried in the base and can tend to look a little bumpy so I would recommend a few coats of top coat to smooth everything out. The base is also frosty and lends itself to brushstrokes so be careful during application.

Mrs. P's Nail Potions Spring Fling

This was my first experience with a colour changing polish and I can see the appeal! You have instant nail art without really trying which is awesome. This goldy-brown colour isn't something I would normally reach for, but it is an interesting colour none the less.

You can purchase Mrs. P's Nail Potions here in her etsy shop for $7.97 USD or $8.00 CAN. Spring Fling is in stock (at time of posting) but Gold Digger is not. Keep up with Mrs. P's Nail Potions on Facebook and Twitter for all the latest news!

Some products provided for my honest review. 
 

LinkWithin

Related Posts Plugin for WordPress, Blogger...