Showing posts with label tutorial. Show all posts

Tuesday, 5 March 2013

Money Smart Nail Art: Dotted V-Gap Tutorial

Purchased by Me

Afternoon Everyone!

I have a ton of swatches to share with you, so will have more of those coming up soon but I wanted to share some Money Smart Nail Art! I heard about this nail art contest where you had to come up with a money smart look so you can feel good with a do it yourself manicure instead of going out and spending lots of money on new clothes or a hairstyle or even paying someone else to do your nails! I'm a broke student so I'm all about coming up with looks on a budget so I jumped at the chance!

I decided to create a dotted v-gap look that looks a lot more complicated than it is. Let's run through how to do this!

Supplies:

  • 2 polishes of your choice (I have used NYC Lexington Yellow and Wet n Wild I Need a Refresh-Mint)
  • Any colour striping tape or regular tape cut into small strips
  • A small dotting tool or a pen or a pin stuck into an eraser
Steps:

dotted v gap tutorial

Instructions:

  1. Gather your supplies and choose your two colours. (I accidentally grabbed Sally Hansen Blue Me Away instead of Wet n Wild I Need a Refresh-Mint for this picture)
  2. Paint a few coats of your base colour and allow to dry completely, I used a coat of Seche Vite to speed up the drying process
  3. Take your tape and cut pieces and line them up with the middle of your nail
  4. Take your contrasting colour and paint starting from the outside swooping up to create that curved line 
  5. Remove the tape and clean up any excess polish you may have on your skin 
  6. With your dotting tool and your first polish make dots along the curved line
  7. With your other polish place dots on the inside and going up your nail
  8. Clean up and add your favourite quick dry topcoat!

dotted v gap nails
dotted v gap nails
The polishes I used can be easily found at your local drugstore for a few dollars a piece and if you don't have dotting tools or striping tape it is easy to use regular tape and a pin stuck into an eraser! You could do this look in endless colour combinations :)

I hope you enjoyed this tutorial and let me know if you have any questions or what you think! If you'd like to enter into the contest here are all the details.

Hope you're having a great day!

Saturday, 8 December 2012

The Cutest Santa's Ever Tutorial!

Morning loves!

Today I have the tutorial for the Cutest Santa's Ever, which I showed you on Tuesday. These are seriously one of my favourite designs I've come up with and I'm super excited to share the tutorial with you!

Here are the nails that the video shows you how to create,


Here's the video! I hope like it :) If you create these nails, please share with me on my Facebook wall or on Twitter! I would LOVE to see them :)


So full disclosure, shooting videos is hard, especially without a tripod (fingers crossed I'll get one for Christmas!). Please forgive the little things in the video like my naked thumb haha.

I hope you enjoyed the tutorial and you can follow my YouTube Channel here!

Wednesday, 24 October 2012

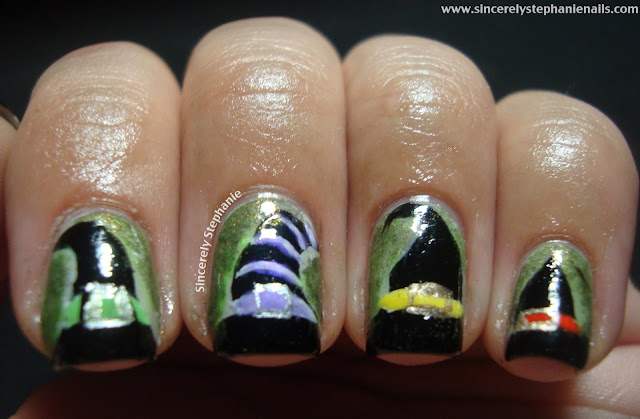
The Witchiest Nails of Them All + Tutorial!

Morning Ladies and Gents! Today starts Halloweek here on Sincerely Stephanie! For the next week I will endeavor to post nothing but awesome Halloween themed nails and hopefully throw in a tutorial or two along the way. In the Tell Me Something entry of my giveaway you guys have been requesting a lot more tutorials, so I am going to try and make that happen! If you ever see something that I haven't done a tutorial for, but want me to do one, PLEASE send me an email or comment about it! Sometimes I'm just not sure what you all want to see and then don't end up doing one.

Onto today's nails! I had the idea for these at work one day when I was thinking about Halloween themed things. My mind jumped right to witches and their awesome hats! I like a good witches hat as much as the next girl so I thought I would top my nails off in a few hats.


These nails were easy enough to do, and I tried to film a tutorial, but my camera would NOT cooperate  So I settled for a picture tutorial and I'll give some text to accompany the steps.


Step 1: Start off by painting your base colour. I went with OPI Skull and Glossbones, but really any light colour will do.

Step 2: Take a black striper, I used It's So Easy Stripe Rite Black and draw some outlines of witches hats. I found it easiest to draw a french tip first and then create a shaky triangle going up my nail. Don't worry about any imperfections! You'll fill this in later, and witches hats come in all shapes and sizes :)

Step 3: Take a black creme and using a nail art brush, fill in the outlines that your created in Step 2. You'll have these strange looking black blobs on your nails that will become witch hats.

Step 4: Use a white creme and a striping brush to create stripes right above the brim of the hat, or where the end of a french tip would be. You can create a band like I have on my index and ring nails, or you can add stripes all the way up like I did on my middle nail to give the hat a little something extra. I created the lines in white first so that the colours would really pop when I added them next.

Step 5: Add some colour to your bands! You can use absolutely any colours you want here. I went with, yellows, orange, green and purples to keep the colours feeling halloweenish, but the possibilities are endless. Just go over where you added the white band with a nail art brush and your colour. It does not need to be perfect, your colour probably won't show up too much over the black base if you draw outside the lines.

Step 6: Add a buckle to the band! Use any metallic polish, silver, gold, copper, or any colour you want your band to be and your striping brush to add 4 small lines to create a buckle. I found it best to add the lines on the top and bottom of the band first, because you can just follow the line you have already made and then just connect the top and bottom lines.

Step 7: This is an optional step. I felt like my base was lacking a little so I took Wet n Wild Blackmail a sheer black with coppery flecks and sponged it around the hats. I then took Wet n Wild Fergie Glowstick and sponged it over Blackmail to give the whole thing a ghoulish glow (not pictured)

Step 8: Clean up your cuticles from where you were sponging and apply topcoat! You will have the witchiest nails of them all!


I'm pretty sure I haven't seen Witch hat nails done like this before and they were really cute and easy to accomplish! I would totally rock one as an accent nail and use a Halloweeny glitter on the rest of my nails if I were to do this again! For the bands on my hats I used, OPI Roll in the Hauge, OPI Gargantuan Green Grape Matte, Cult Nails Charming and Essence Wanna Be Your Sunshine!.


Well what do you think of my Witchiest Nails of Them All tutorial? Would you attempt these nails? If you do please share them with me on Facebook or Twitter! I would love to see :)

Hope you're having a witchy Wednesday! ;)

Thursday, 26 July 2012

Jelly Gradient Sandwich Tutorial!

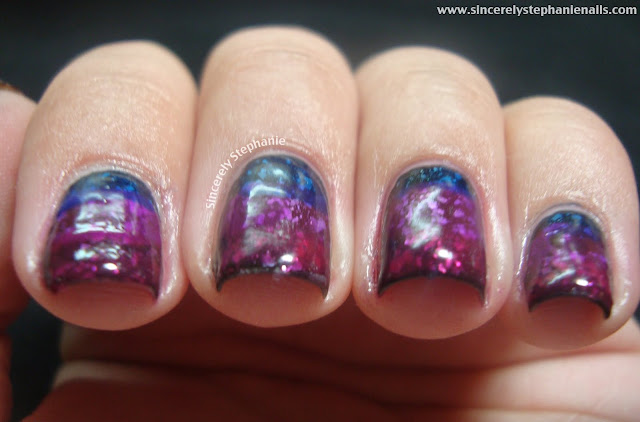
Gooooood Morning loves! Today I am very excited to present my Jelly Gradient Sandwich Tutorial and my YouTube debut!! You have seen the jelly gradient sandwich twice on my blog before, here and here. Each time being a different set of gradients. Well today I decided to create a blue to purple to pink jelly gradient sandwich!

jelly gradient sandwich nail art

I got a lot of comments on my past two jelly gradient sandwich posts so I figured it was time to make a tutorial for you all! Now before you watch, I have a lot I can improve upon. I know essentially nothing about videos, but iMovie tutorials helped me and here we have my very first tutorial! All things considered I think it's halfway decent for my first try :) 


I'm hoping that I will improve with more practice and that my voice overs will eventually get better, so please bear with me while I try to figure out all this YouTube stuff! :)

Meanwhile if you would like you can subscribe to me YouTube Channel! :)

jelly gradient sandwich nail art

The polishes I used for this manicure are, Nailtini Espresso, Sally Hansen Glass Slipper,China Glaze Ride the Waves, China Glaze Under the Boardwalk and OPI Too Hot Pink to Hold Em. I'm not going to give a verbal explanation because that's what I made the video for! ;)

jelly gradient sandwich nail art

I hope you all enjoyed my first foray into creating tutorials! If there is anything else you would like to see a tutorial for, so I can practice, because I need it, let me know!

I would love to see if any of you attempt the Jelly Gradient Sandwich so keep up with me on Facebook and Twitter to show me! :D

Thanks SO MUCH for stopping by!!! :D

LinkWithin

Related Posts Plugin for WordPress, Blogger...