It's SAAATTURDAAAYY!
I'm home for the holiday weekend (Canada Day is tomorrow What What! *raise the roof motion thrown in there*) and I am feeling MUCH better. Thanks to everyone who wished me well this past week :) Plus I am off to the beach today! So excited!! :D
A while back Born Pretty Store contacted me about reviewing some of their awesome nail art supplies. For my first review I chose some small loose glitter! The name on the website for these is Shiny Glitter Powder Sheets. It comes in 12 small tubs of different coloured small hexagon glitter. These tubs are packed so you will never run out. I've created a few different looks with this glitter and I'm going to show you two of them today!
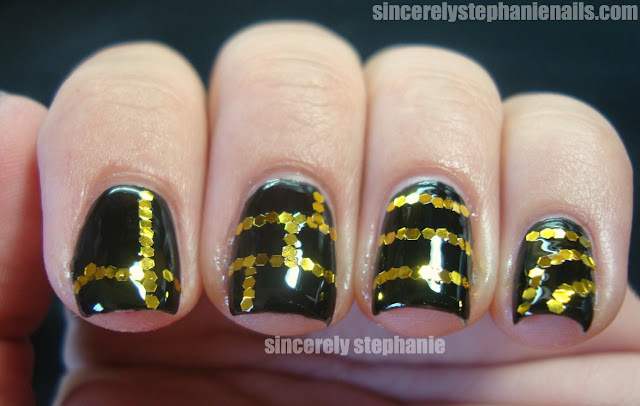
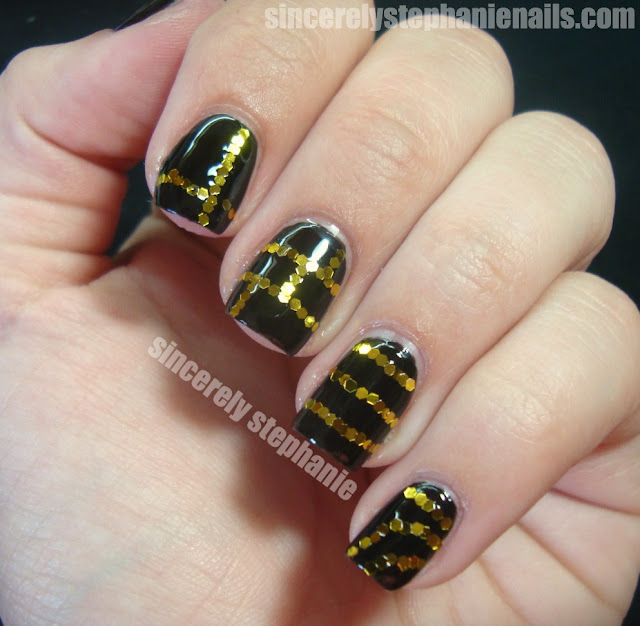
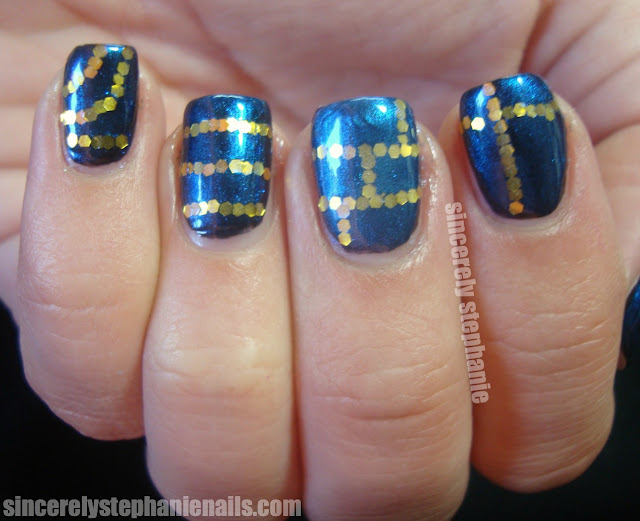
The first look I created was this edgy black and gold glitter look. This was really simple to create! All I did was paint 2 coats of Nailtini Espresso which is a plain black creme. Once I was finished I added a topcoat and then using a dotting tool placed the gold glitter individually on my nail. The different patterns were just kind of created randomly as I went!
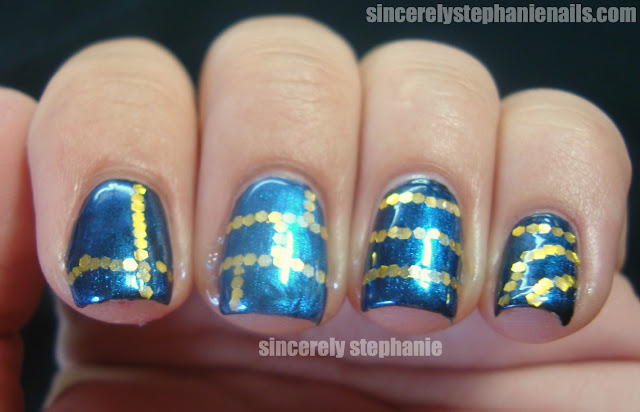
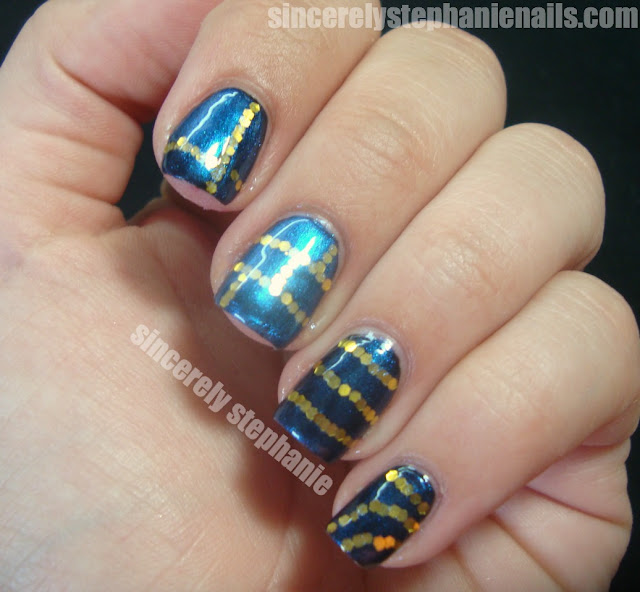
I had so much fun playing with these! Yes they are slightly time consuming to place, but you obviously don't need to do as much or as many as I did. After I did this I had a cool topper from Nailtini called Blue Flame sitting out that I wanted to try, so just for fun I put it over this creation!
Ok now this I was slightly dying over. The blue with the gold glitter and the overall iridescentness of it? Woooohoo it makes me smile.
I love that the glitter shows up even through the Blue Flame topper. I just felt like a punk rockstar with these nails! (Ok Ok I know they aren't really punk rock, but I really enjoy them regardless ;))
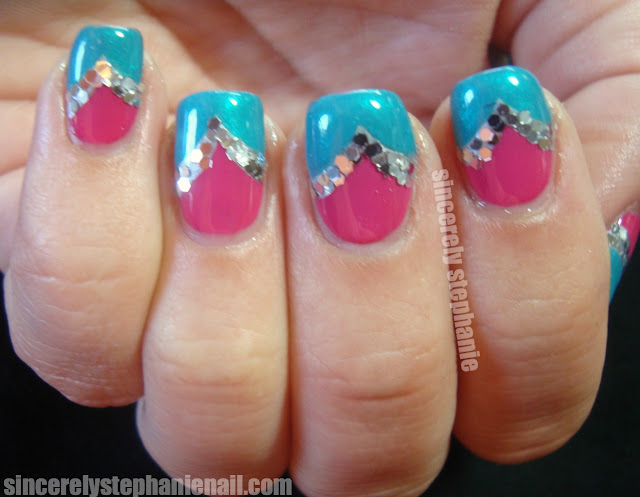
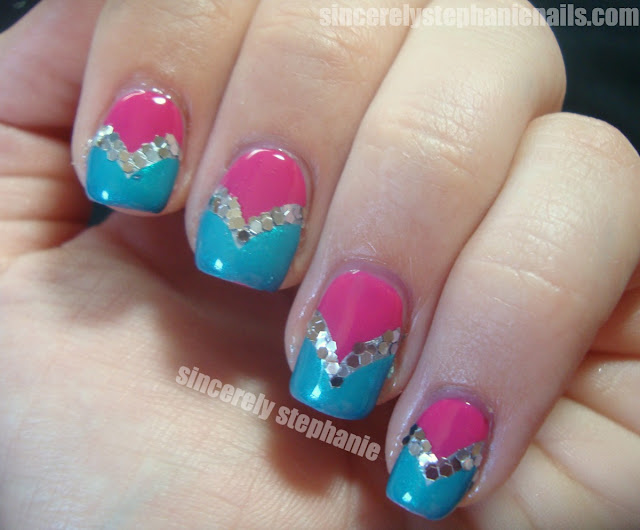
Remember the Fishtail nails I posted this past Wednesday? Well the next day I was starting to feel slightly better so I decided to add some silver glitter to it!
The method for creating this look was the same as before. Just added a coat of topcoat and then with a dotting tool placed the glitter onto my nail into the silver area. The silver glitter is soo shiny! I felt like I had little disco balls on my nails lol!
Eeeeeee I had fun playing with this glitter. It is rather small, so expect to take a little extra time placing it. But since it is so small you will never run out! This set came with 12 different colours, the silver and gold and then 10 other gorgeous iridescent glitters. For all 12 pots it only cost $6.93! For glitter that you'll never run out of? That's a hell of a deal. You can find the exact glitters here. You can't beat Born Pretty Store for their prices and quality of nail art supplies! ANNNDD if you want to buy something remember to use my 7% off code! SA7X31
Do you like the look that I came up with? Would you try your hand with using loose glitter like this? Would you create something like this? I'd love to hear what you think!
Hope you are all having a wonderful Saturday!! Thanks for stopping by! :D
The glitter used in this post was provided for my honest review by the manufacturer or their PR company.
Saturday 30 June 2012
Friday 29 June 2012
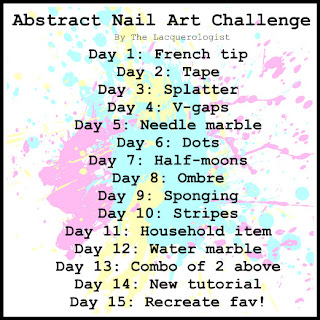
Abstract Nail Art Challenge Day 15: Recreate Fav!
Wow! It's the last day in the Abstract Nail Art Challenge! This challenge has been SO fun. I have loved seeing what these talented nail artists have come up with. This month has completely flown by. Today we were supposed to recreate one mani that our challenge buddies came up with! Let me tell you this was soo difficult! I had to make lists and then eventually ended up doing a coin toss competition where I assigned one as heads and one and tails and after many coin tosses I settled on recreating Emily's Day 13 Combination of two techniques!
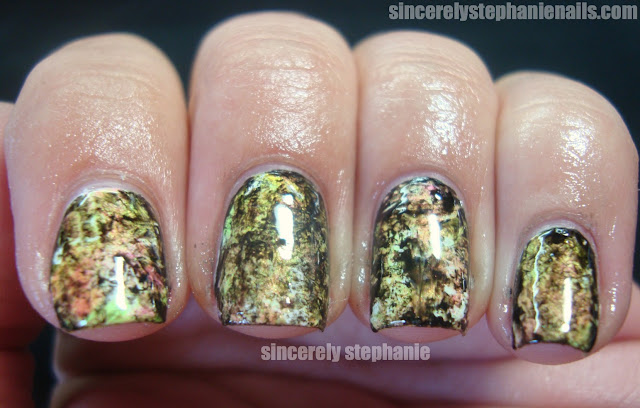
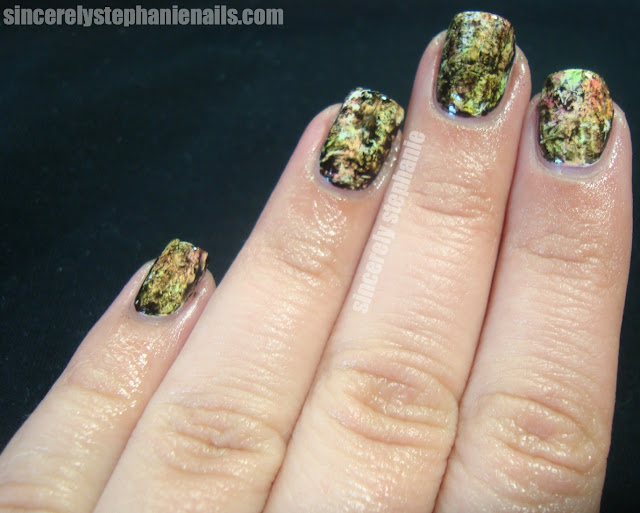
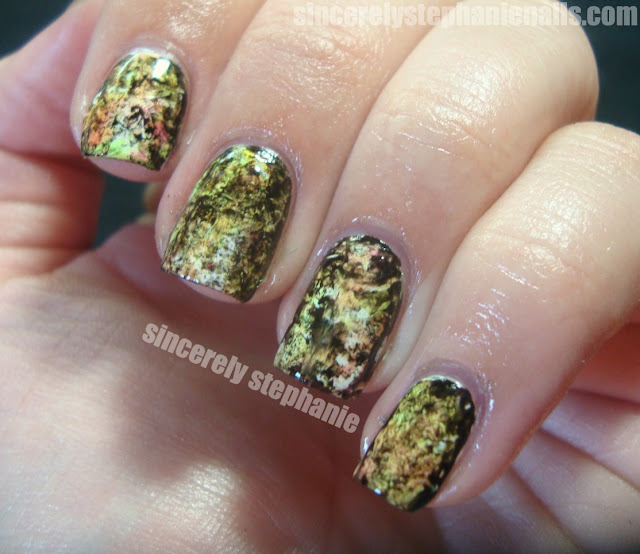
How cool is this combination of textures?! There is so much going on here and I love alllll of it. Emily really knocked this out out of the park creating it! Since I don't have the exact polishes she used I started off with Sally Hansen White On then sponged on China Glaze Hang-Ten Toes, China Glaze I'm With the Lifeguard, China Glaze Flirty Tankini, and finally China Glaze Sun-Kissed. The neon colours really pop on the white base and the black saran wrap on top? I'm losing my mind at how much I love this! The black I used was my go to, Wet n Wild Black Creme.
I've got a serious case of sausage fingers going on in these pictures, but focus on how cool my nails look!! Like Emily's nails when I did the saran wrap it picked up some of the neon polishes and allowed some of the white to show through. It's a mad cool look and I think I'll be rocking this again at some point in different colour combinations!
Oh man I want to wear these for a loonnnnggg time. They are so punk and edgy and just completely rock! I'm glad my coin toss tournament landed me on these bad boys. Although I'm sure any mani I recreated from these fine artists would have me swooning. I anticipate I'll be recreating their creations for a looong time to come.
This challenge was insanely fun to do! It was great to practice some new techniques and build on some that I've tried before. It was really neat to get creative within a defined technique. I'm going to miss waking up and checking right away what these ladies have come up with!
Don't forget to stop by my wonderful challenge buddies to see what nails they chose to recreate!

Thursday 28 June 2012
Maisie Shine Magic Carpet Ride and Villian
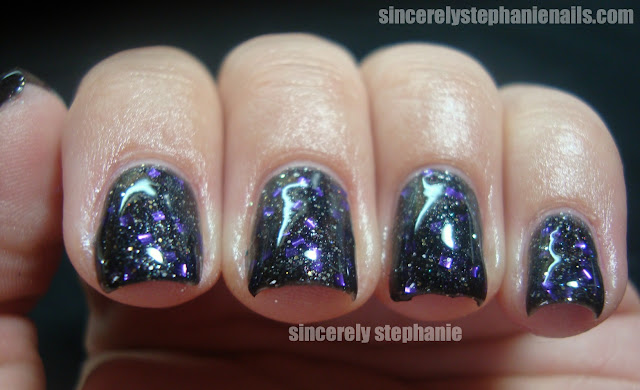
Indie polish time! Today I've got 2 polishes to share with you from a new to me indie brand, Maisie Shine. Maisie Shine nail polishes are made by Lindsey and are 3 free. I have two of them to share with you today, Magic Carpet and Villian! First up is Magic Carpet.
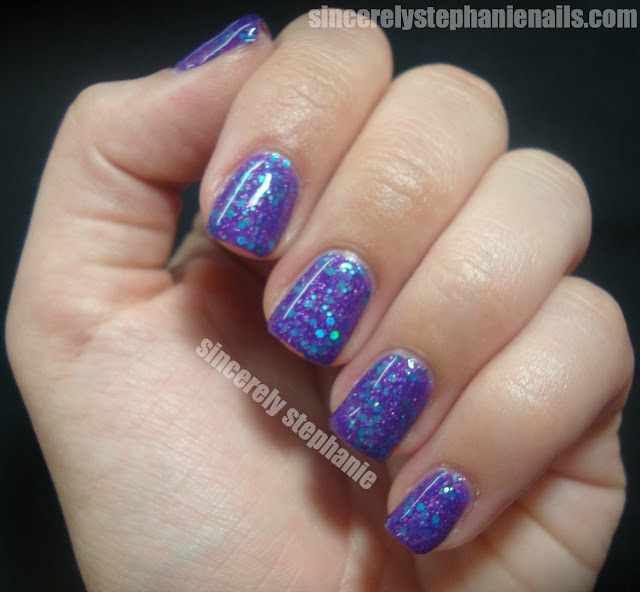
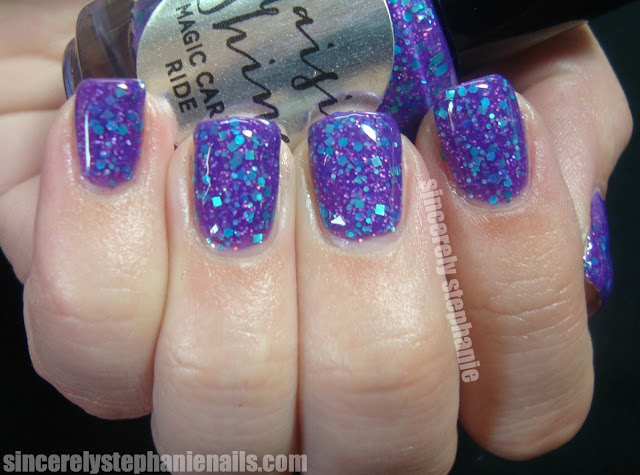
Magic Carpet is a warm purple jelly pack with teal blue hex and square glitter as well as some purple holographic glitters. Lindsey describes the polish as, "Get whisked away to a whole new world with this Magic Carpet Ride nail polish. This polish is purple with holographic micro glitter teal glitters galore." Glitters galore certainly describes this polish. It is honestly one of the most packed glitters that I have ever tried. My swatches show 2 coats and I had to do absolutely no placing of the glitter.
Since my camera absolutely hates purples imagine this purple to be slightly warmer than it is. I think the first picture does the best job of capturing the colour.
This really does remind me of the magic carpet from Aladdin! I can see the carpet flying through the night sky and I start singing A Whole New World! lol I'm such a Disney Buff.
Next up is Villain.
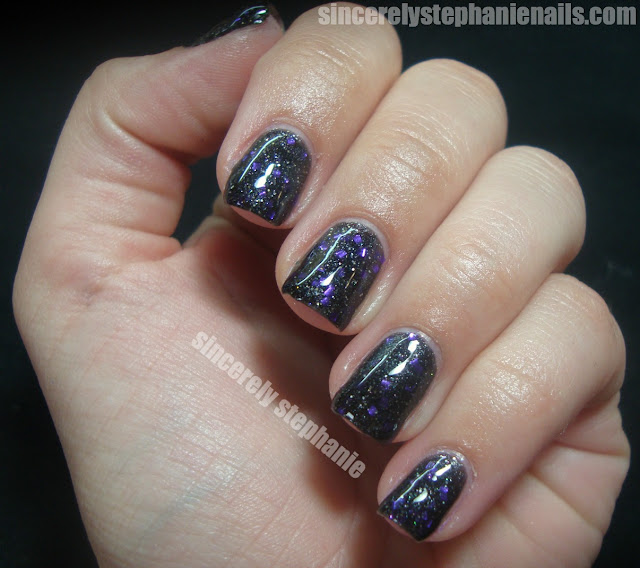
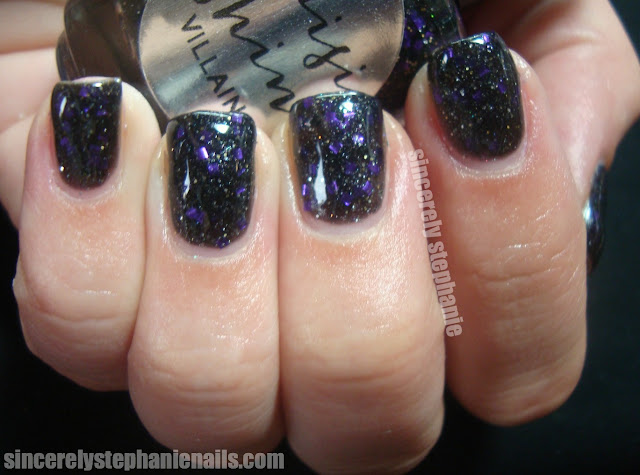
Ok now this I am all over! A deep vampy black jelly filled with purple square glitter and silver microglitter. Lindsey describes this polish as "Channel your inner villain with this dark jelly polish scattered with black, purple and silver glitters" Again I had no issues with having to dig for glitters. This was two plain regular coats of squishy jelly glittery goodness. My camera had no issues with this polish so this is true to colour.
This polish completely reminds me of Maleficent from Sleeping Beauty. I can just see her becoming the dragon and when she's the witch she would totally be rocking this polish!
Maisie Shine lacquers are sold for $9.00 each for a full size 15mL bottle in their Etsy Shop. Both these polishes and more are available right now so I would head over and scoop yourself up a bottle or two! There are a few more in there that I am seriously lemming. You can also keep up to date with current news on Maisie Shine's Facebook Page. She also might have a giveaway going on her Facebook page right now so I would head over there and give her a like!
What do you think of these polishes?
The products in this post were provided to me for my honest review by the creator.
Wednesday 27 June 2012
Abstract Nail Art Challenge Day 14: New Tutorial
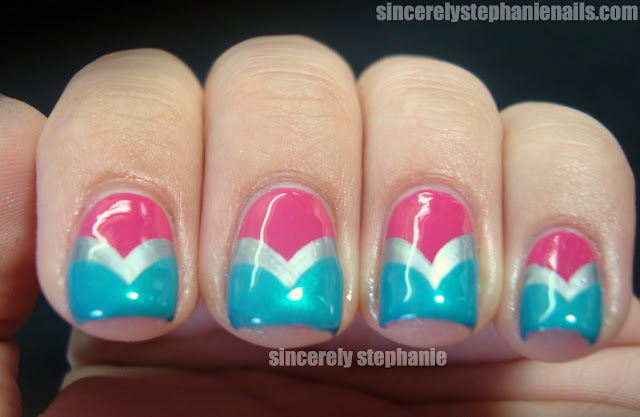
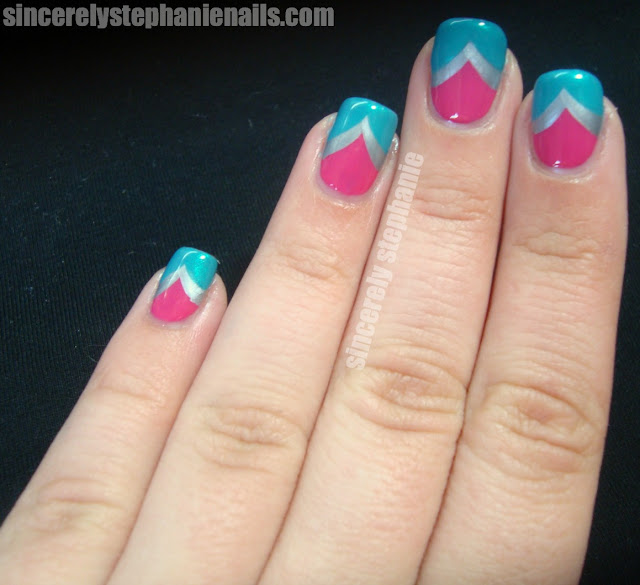
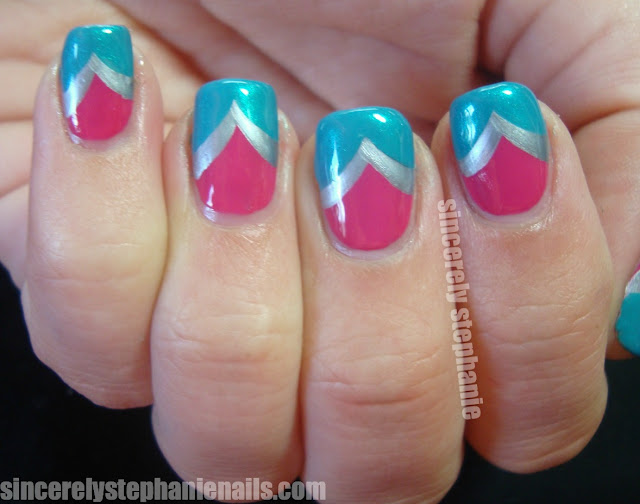
Today is the second last day in the Abstract Nail Art Challenge! Holy Cow! I can't believe it's almost done, aaannnd I can't believe I just said holy cow. This sickness is getting to me. The criteria for today is a New Tutorial. I decided to go with the Fishtail Nail Tutorial done by Sarah of Chalkboard Nails!
I was surprised at how much I love this design! It really was incredibly easy to do and has a really flattering and nail elongating effect! To start off I used Nailtini Grenadine which I think is my new favourite pink. It is so hot and vibrant! And could almost be a one-coater. I used two for good measure. Then using Nailtini Silver Slipper I added the first fishtail and then using Orly Bailamos added the second fishtail! All done with the polish brush this was incredibly easy to do :)
I realized after I did this that my colour scheme was incredibly similar to the one that Sarah used in the tutorial. Oops I guess I just had the image in my mind and went with it! Oh well it is try a new tutorial day right? lol
This was really fun to do! I had been wanting to try this look for awhile and I'm really glad I did! Obviously there are endless colour combinations and I can see this look making an appearance again and again on here.
Do you like the fishtail/chevron look? Have you tried this? In what colour combinations? I'd love to know!
Don't forget to stop by The Lacquerologist, BeautyGnome and Manicurator to see what tutorial they attempted! Also make sure you come back on Friday to see what we all recreated!

Tuesday 26 June 2012
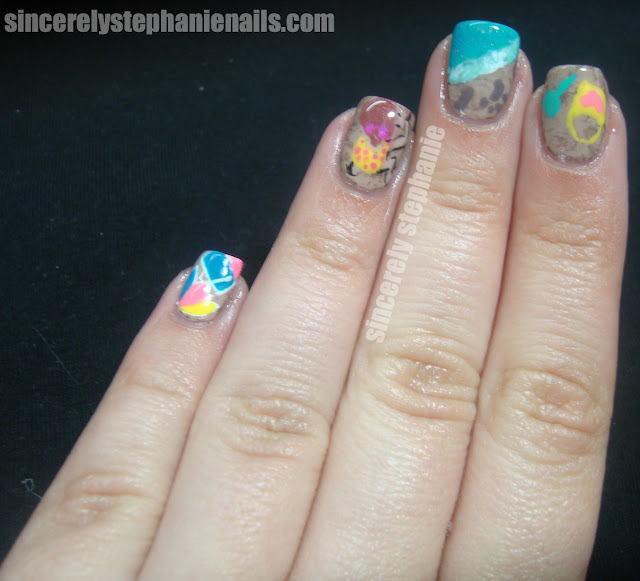
Beach Day
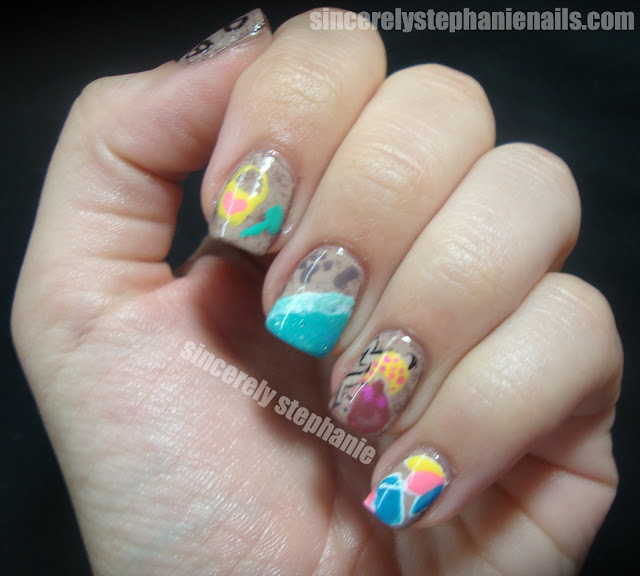
Hey Guys! Today's post is going to be shorter on the writing side, I've come down with a nasty virus that pretty much has me sleeping a ton and not feeling great. My prof actually told me to leave class yesterday because I looked so terrible. How often does that happen? lol! Anyway today I have some nails to show you that I entered in Daring Digits Beach Day Nail Art Contest.
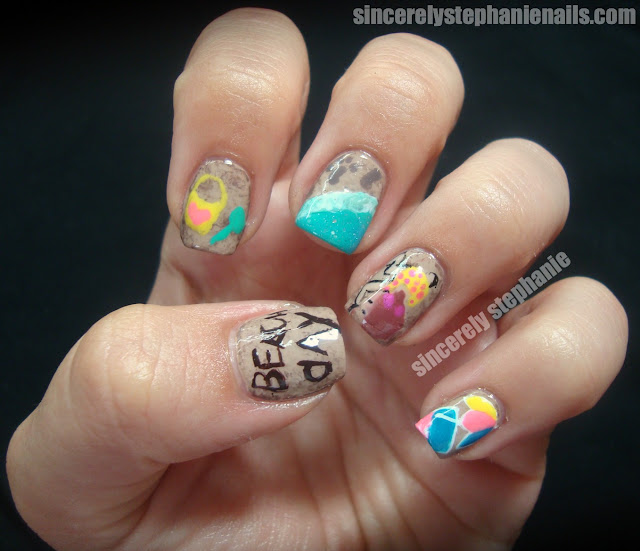
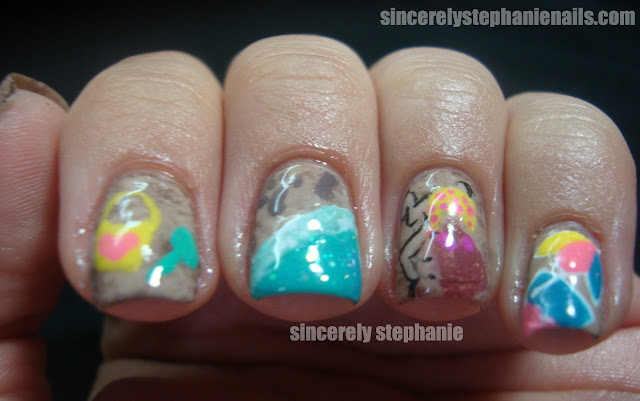
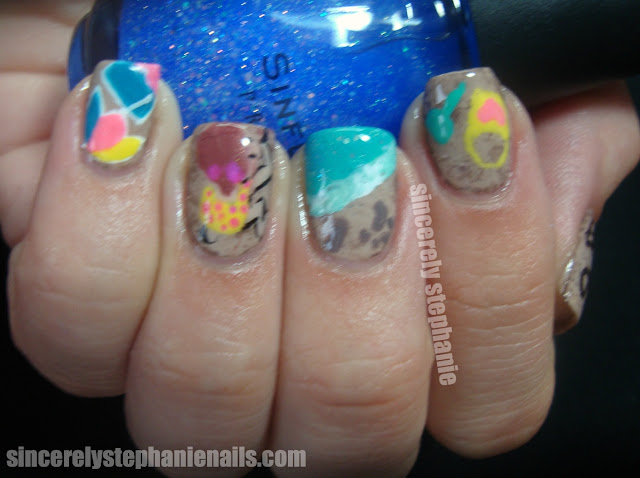
My original inspiration for this was to have a little girl drawing the words beach day in the sand. To get the sandy look I used the saran wrap technique. Then I drew the little girl and tried to connect her to my thumb drawing Beach Day!
The rest of the nails are pretty self explanatory, her towel and umbrella are on my pinky, my middle nail is the ocean coming in and her foot prints coming out of the water and finally on my index is her pail and shovel! I'm not going to say what each polish is, but I have a list of all the polishes I used below (thankfully I typed this right after I did the mani lol) If you have any questions about any specific polishes just let me know in the comments!
Barielle Do Unto Others
China Glaze Hang-Ten Toes
Essence Nude It!
Essence Wanna Be Your Sunshine
Essence Let's Get Lost
Essence Walk of Fame
Essie Brick Oven
Essie Knockout Pout
OPI Samoan Sand
OPI You Don't Know Jacques
Sally Hansen White On
Sinful Colors Hottie
Stripe Rite Striper Black
Stripe Rite Striper White
Revlon Hot For Chocolate
How do you like my Beach Day nail art? I hope you are all having a great day! I'll be in bed watching bad tv lol :)
Monday 25 June 2012
Abstract Nail Art Challenge Day 13: Combo of Two
Today is the 13th day in the Abstract Nail Art
Challenge! It seems so crazy that June is almost over and that this challenge
is almost done. I’ve had a great time seeing what these fabulously talented
girls have been coming up with.
The criteria for today is Combo of the Two. This means that
any of the previous criteria can be combined to create a manicure. Let me tell
you, this was actually hard! I kept going back to thinking of doing something
with dots. But I do a lot of dotticures and I was trying to think of something
a little different. I eventually settled on something I don’t think has been
combined before! Splatter and V-Gaps!
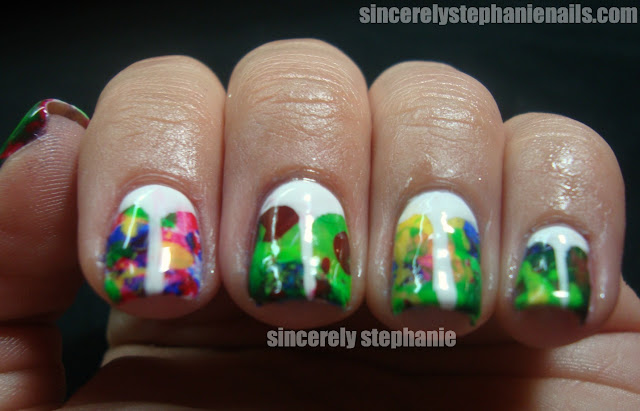
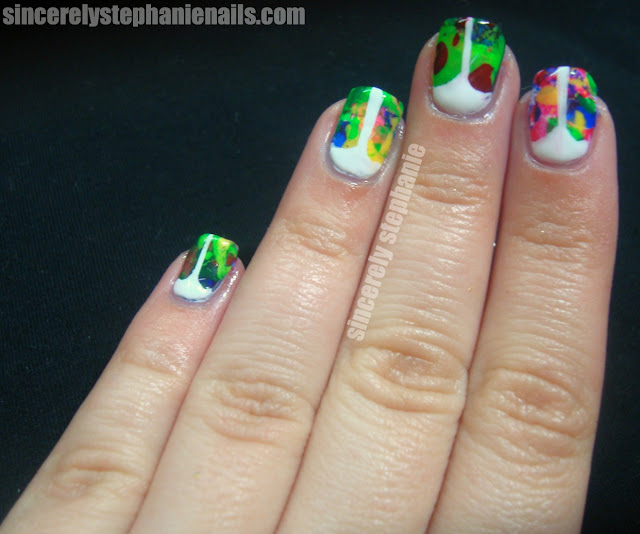
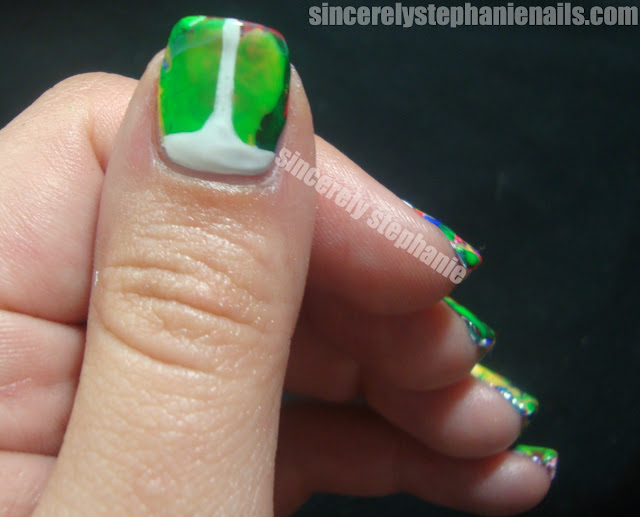
This wasn’t exactly as I had envisioned it. I think I had
imagined that all the nails would look more like my index finger, which was my
favourite. Unfortunately I splattered the green last and it kept coming out in
big globs so most of my nails looked green! Ah well I think the effect is still
pretty cool!
The polishes I used to create the Splatter V-Gaps were as
follows, I splattered them in this order.
Orly Royal Navy
China Glaze Vermillion
China Glaze Vermillion
Essence Wanna Be Your Sunshine
Ardene Neon Green
The base and the V-Gap were done using my current go to
white crème Sally Hansen White On.
I only wore this for about 24 hours (this seems to be the
case with all of my nails these days LOL) but in that time I got a bunch of
compliments! I really liked the primary colour combination. I think that this
could look interesting in a bunch of different combinations and I already have
another one planned!
How do you like my Splatter V-Gaps? Would you try something
like this? Or is it a little too bold for your liking?
I can’t wait to see what combinations my challenge buddies
came up with! Remember to stop by and see what they did :)
Sunday 24 June 2012
Beauty Blogazons Weekly Roundup!
- Pink Sparklz- On Wednesday's we wear pink! Pink NOTD! Sinful Colors & O.P.I.
- Mama Fashionista- Allow Mama Fashionista to introduce you to Evie Evan and the last concealer you will ever need (it's HG status)!
- Ishah x Beauty- It's Girl's Night at Ishah x Beauty! Check out some good eats, drinks and my FOTD.
- Phyrra- Wanna steal the spotlight? Phyrra tells you to break out the Anastasia See and Be Seen Kit.
- Midnight Manicures- Water Marbling with Patricia, see this nail art technique at it's best.
- Beauty Product Review- Discover the mask that has completely changed my complexion and made every night a spa night!
- Cosmetics Aficionado- Hourglass Femme Rouge Velvet Creme Lipstick in Ballet might be your perfect Barbie pink.
- Creatively Yours by Ro- Smooth out your edges with Carols Daughter Macadamia Hold & Control Smoother
- Adore-a-polish- Get scrubalicious with this yummy grapefruit sugar scrub from Qtica.
- Confessions of a Sarcastic Mom- Check out four lovely Zoya shades at Confessions of a Sarcastic Mom
- Sincerely Stephanie- Looking for an easy way to do nail art? Check out how you can create art using your own fingerprints!
- Shades of Beauty, Inc. It Works! BZZAGENT REVIEW: Smooth 'n Shine® Keratin Power Semi-Permanent Hair Tamer
- Mani Curiously- The First 50 Giveaway Celebration! Come celebrate Dom & E's first follower milestone with this great giveaway!
- Laura from My Newest Addiction Beauty Blog checked out the Hey, Sailor! collection from MAC and shared her review on the limited edition Fleet Fast blush!
- Beyond Beauty Lounge- Easy Ombre with The New Black
- The Beauty Delicacy- The sweetest shade of red gloss perfect for Summer
- Beauty by Miss L- Check out Miss L´s bright summer eye makeup look
- Emily Hudspeth, hair design & makeup artist- The Big Reveal is here! Part 3 or the "After" of the makeover series for this soon to be new mom, is on the blog. Next up, the makeup lesson.
- Liquor, Lube and Lipstick- My latest hair adventure, combining my two favorite loves, neons and ombré hair.
- Cosmetically Challenged- Cosmetically Challenged shows you what Orange Neon nail polish is all about with Sations "One & Only Orange" from the California Gleamin' Collection
- Nails Beautiqued- It's summertime! Want some nailart ideas? How about some Wispy Flowers.
- Dorothy's little wonderland- What should I do if I would like to change the skincare routine. Tips and tricks to minimize the irritations
- The Polished Zombie- Star Wars and Nail polish? The Polished Zombie proudly lets her geek flag fly with an out of this world polish from Amy's Nail Boutique.
Saturday 23 June 2012
Abstract Nail Art Challenge Day 12: Watermarble
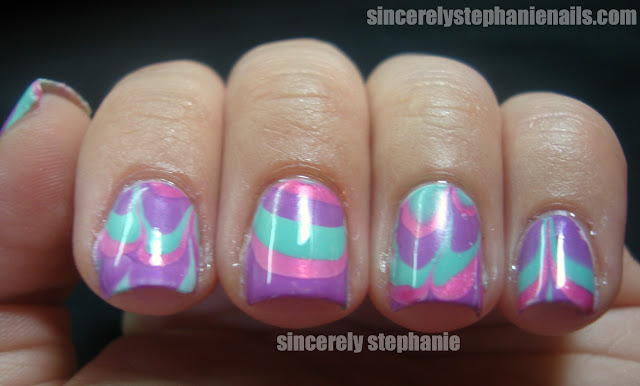
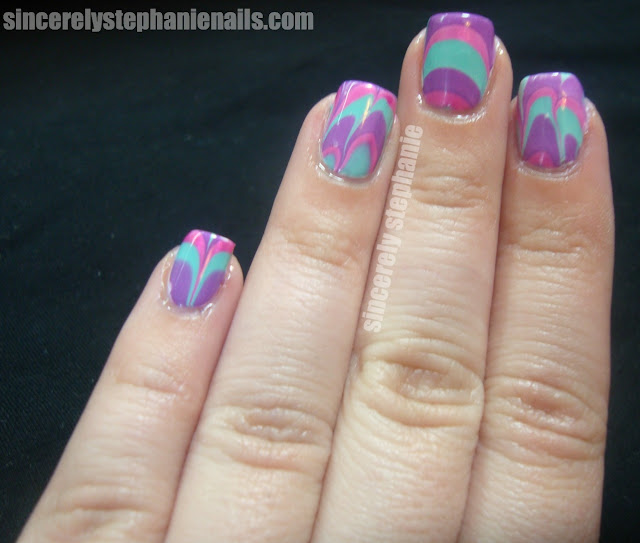
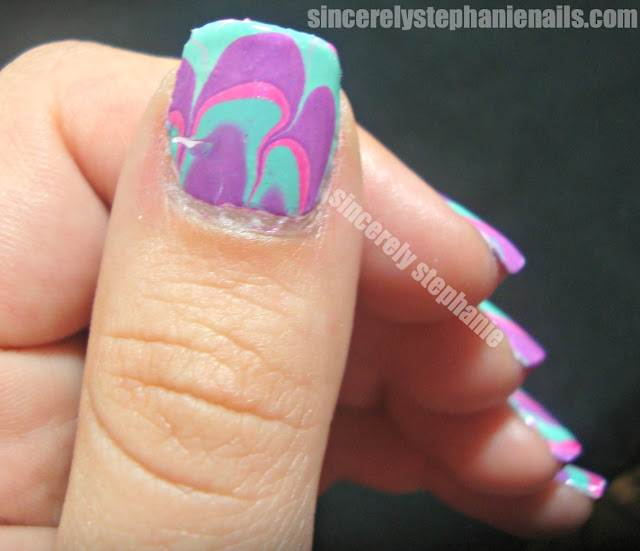
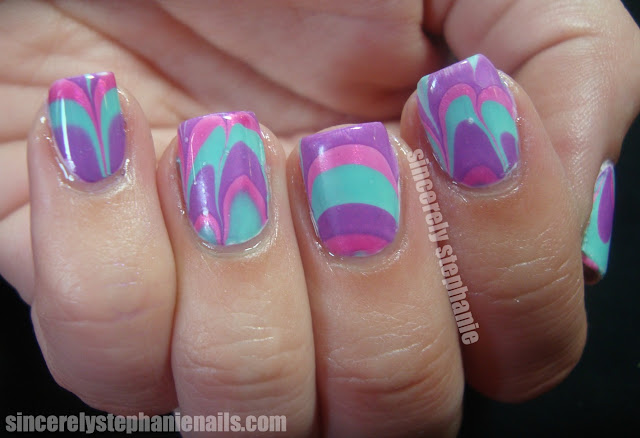
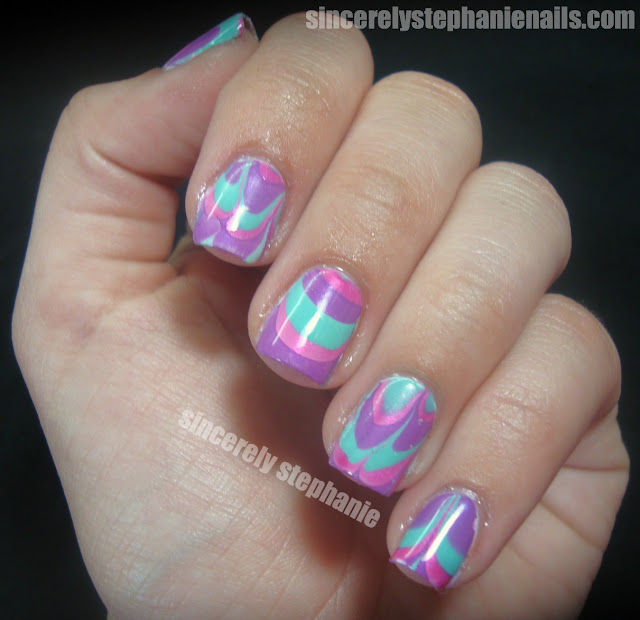
It's Day 12 of the Abstract Nail Art Challenge!! I can't believe there is only a week left in June! Where has the time gone? The theme in todays challenge is Watermarble. Me and the watermarble have come a loooong way in my journey through the nail world. A few months ago I used to attempt them, trying all different types of water and different types of polishes and NOTHING would work. The polish wouldn't spread and then I couldn't draw a design and I would end up spending hours getting frustrated and usually end up crying. Yes I know that sounds pathetic. During the last challenge that I did I finally did my first semi successful marble! And I think this one is even better! I really think practicing has helped. Yes I have some water marbling bloopers that I haven't shown on here or I'll do one or two nails to practice and then decide to go for a completely different manicure. Alas here is my marble for this challenge!
I think my favourite nail of the bunch is my pinky! That was the original design I was going for however I didn't figure out how to place my nail in the water to get that until I got to that nail lol! I did a white base using Sally Hansen White On and then marbled using China Glaze Don't Touch My Tiara, China Glaze Gothic Lolita and China Glaze For Audrey. I chose these colours because they are all the accent colours on my blog!
I loved all my nails except for my thumb. I got a wicked split in my nail and I was attempting to repair it using the teabag method, and it worked great, except for the fact that I cut the teabag too big so it went right down to my cuticle. Since I don't wear polish right down to my cuticle it looks a little awkward. Normally I would have redone the whole thing, but I was in a slight rush so I just left this one. Please forgive me :) Also when I was cleaning the polish out of the shot glass the toothpick rubbed my mani just a tad. So that's why there is this awkward mark. My bad.
Overall I'm really pleased with this manicure! The dreaded watermarble is no longer quite so dreaded. Maybe one day I will do a water marble that isn't for a challenge and post it on here! lol!
Do you have a technique that you struggle with again and again? Do you love to marble? Let me know!!
Don't forget to stop by my challenge buddies and see what they came up with for their water marble!
Friday 22 June 2012
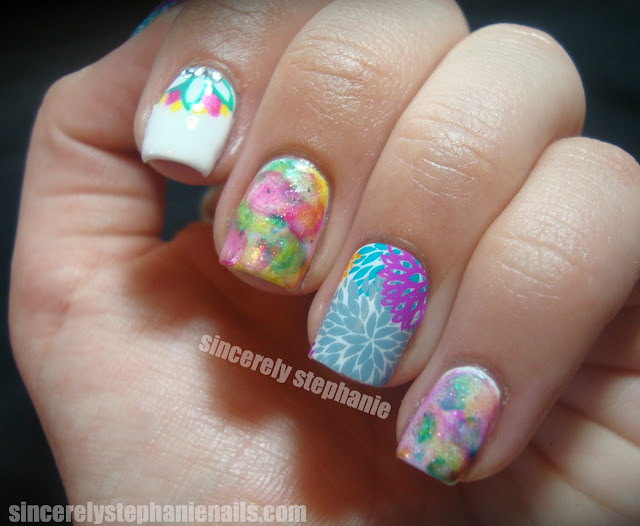
The Mix it Up Manicure Featuring Jamberry Nail Sheilds
Today I've got an awesome product to share with you guys! You all know me and my love for accent nails and well just crazy nails overall. I am for sure not scared to mix things up a little when it comes to my nails.
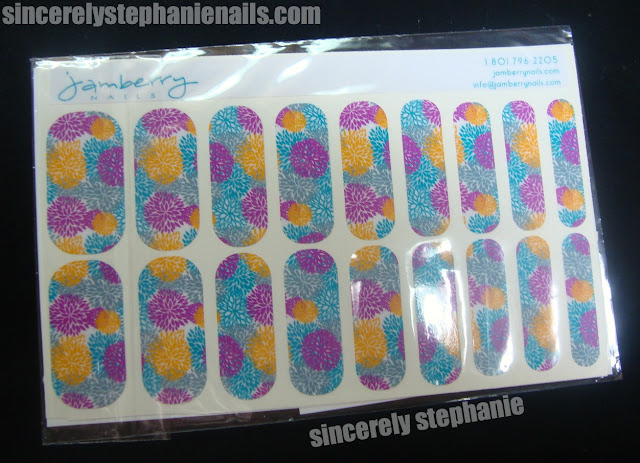
Nail wraps are something that are gaining huge popularity right now. There is no dry time and often you can achieve brilliant looking nails without taking hours or any special materials. There are nail wraps made with real polish, ones that are close to stickers and vinyl. Today I'm going to be sharing with you Jamberry Nail Shields and they are made of vinyl! Something that has often deterred me from purchasing nail wraps is the cost. I tend to like to change my nails every other day to every other day, so the cost for a few days wear seems a little pricey for a college student. However! by using your Jamberry Nail Shields as accent nails you can extend the life of your package!!
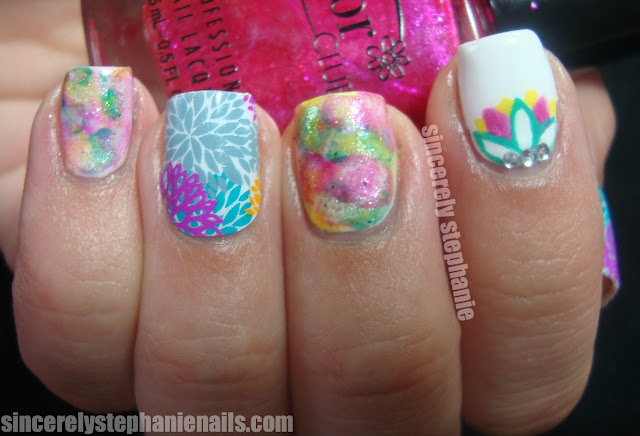
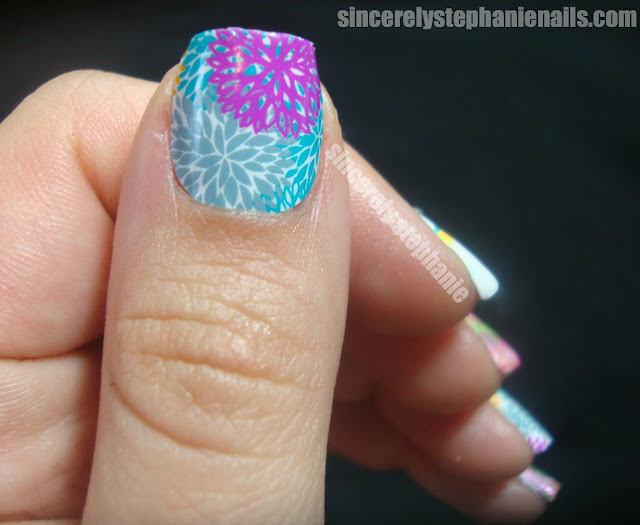
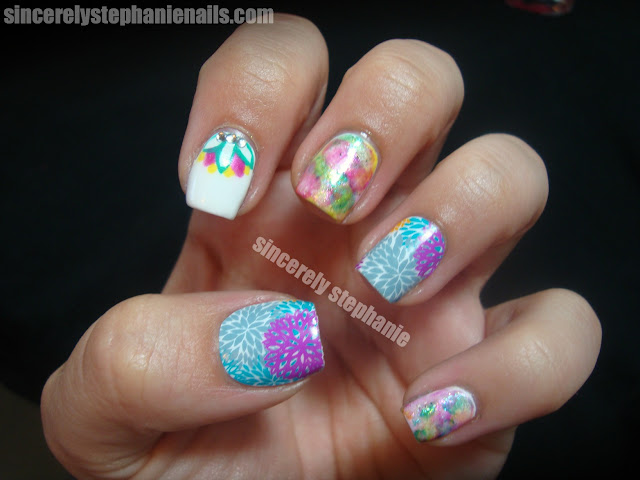
May I present what I am calling the Mix it Up Manicure! To create this look I used Jamberry Nail Shields in Puff Flower which can be seen on my ring finger and thumb as accent nails. Before I explain the rest of the mani I want to explain how the Jamberry Nail Shields are applied. To apply these you peel off the sticker from the backing and heat with a hair dryer for about 15-20 seconds until they are nice and flexible. Then you stick the freshly heated sticker to your nail and and smooth it down. Once the shield is heated it is incredibly sticky. I had no issues with the nail wrap sticking to my nail. Once it was smoothed down I just cut off the excess and filed off the rest! If you want some more intensive instructions you can visit Jamberry's page.
I loved wearing these! They were super easy to apply and once they were on there they stuck right down perfectly. I had no issues with buckling or them looking bumpy or anything. Also as you can see these are really long and rounded at both ends. Since my nails are shorties I was able to get two nails out of each sticker, which meant for this manicure I only had to use two shields to complete both hands.
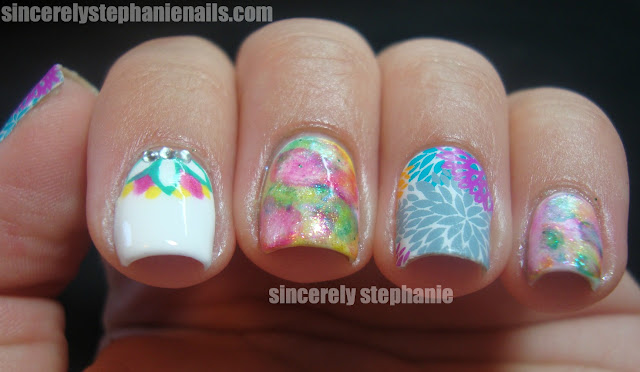
To complete the rest of my mix it up manicure I did the watercolour technique using Color Club Wing Fling, Metemorphosis, and Daisy Does It on my pinky and middle nails. The base I used for these nails was Sally Hansen White On which is just your typical white creme. I loved watercolouring these glass flecks! They turned out gorgeous in my opinion!
I had originally done all my other nails using the watercolour technique, but then this idea popped into my head. I used Sally Hansen White On as my base and then freehanded the teal petals using a medium length striper brush and Barielle Do Unto Others, then I added the pink petals with China Glaze Don't Touch My Tiara, and then finally the yellow ones using Essence Wanna Be Your Sunshine. I added 3 little clear rhinestones to the base of my flower to finish it off!
I really enjoyed wearing this mix it up manicure. I got a ton of compliments and a few WOAH! how did you do that!? On the nail wraps. Once I explained what they were my friends were asking where do I get these?
Well if you want some Jamberry Nail Shields for yourself you can purchase some on their website. They retail for $15.00 USD for a set of shields that are pictured above. Currently they only ship within the US however the consultant that I have been working with is more than happy to ship to Canada as long as you are OK with paying via PayPal! All you need to do is send an email to jnmwilder1@gmail.com with what you would like to order. Also she will only charge you for the actual shields and the shipping to Canada! Not the shipping to her. This is the only way to get these bad boys in Canada right now so I would jump on it ladies!
Do you like these Jamberry Nail Shields? Is it something you can see yourself wearing? How about the mix it up manicure? Would you wear something as wild as this? Let me know!
Hope you're all having a fabulous Friday!!
The Jamberry Nail Shields in this post were provided to me by their manufacturer or PR for my honest review.
Subscribe to:
Posts (Atom)

